
A few months ago I viewed a tutorial on how to enhance your photos using Photoshop Elements. While PSE is a great program, not everyone wants to spend the money to purchase it. Here is where The GIMP comes in handy! The GIMP is a free photo editing software that does almost everything PSE does. However, one of the complaints I have heard about GIMP is that it is not user friendly for beginners. I love using GIMP so I thought I would put together a tutorial for basic photo editing.
To begin, download a copy of The GIMP here.
Photo basics.
Use a sheet or (in my case) a white pillowcase, as your background.
Use natural light from a window whenever possible.
Use the macro setting on your camera (usually a tulip symbol)
Take a couple of shots so that you can choose the best to work with.
Step 1. Take your photo, upload to your computer and open the GIMP program.
(To open your file in GIMP, click on File, select open and choose your photo)
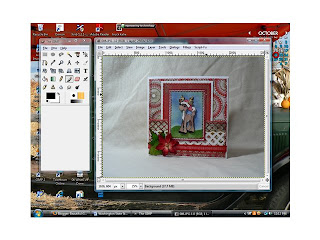
Your window should look like this with the photo and toolbars open.


Step2. Cropping your photo. To crop your photo, choose the crop tool in the toolbox by clicking on it once. (this looks like a knife) Using your cursor, draw a square around your image, leaving a little bit of white on all sides. On
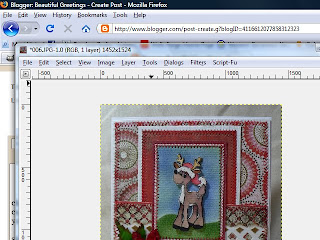 ce you have your square, a box will appear. Click on "crop".
step 3. Now you will have your picture with a transparent background. Select the "Image" tab at the top and select "Fit canvas to layers". This should center your photo and change the background to white.
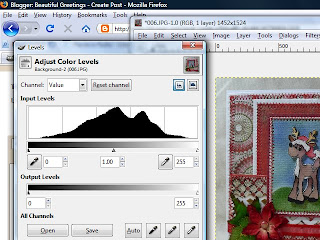
Step 4. Select the "tools" tab and select the "color tools" option. From this option, select "levels". A box should appear with what appears to be black mountains. Under the mountains (for lack of a better term!) there are three arrows. Click on the arrow on the far right and drag to the base of your mountain and release. This will brighten the photo. I usually drag the arrow to the base or just past the base of the black. The arrow on the far left will add more contrast. You can also drag that arrow to see the differences. You can play with this until you get the desired effect. Once you have found the right level for you, select ok.
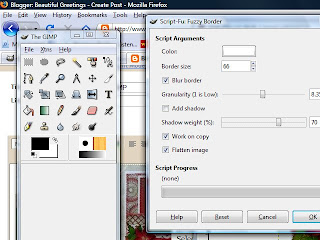
Step 5. Now to add the foggy border everyone loves so much (ok, maybe it is only me!)
Select the tab at the top that says "Script-fu". Under this option select "decor" and choose "fuzzy border". This will open another window with options. There are so many ways to play with your photo here so I will just tell you what I do.
a. Color = White
b. Border size = I usually stay in the 60-70% range.
c. Granularity = Somewhere in the middle (8)
d. Shadow weight = I stay in the 70s
e. make sure your blur border, work on copy nad flatten image boxes are checked and click OK.
Voila! Now you have a bigger, brighter photo with a great fuzzy border. If you don't like the way the border turned out, close the new window and start the script over again.
Step 6. Saving your new photo. Sounds easy enough right! There are a few items that are different in GIMP that I want to walk you through. Click on the "file" tab and select "Save as". Rename your photo and add .jpg at the end of the file. GIMP will not automatically save as a file type. Select the folder you want to save in and click OK. A new window will open and you can select the quality of the photo you want to save. I always choose 100 unless I need a smaller file size.
Now you are done!
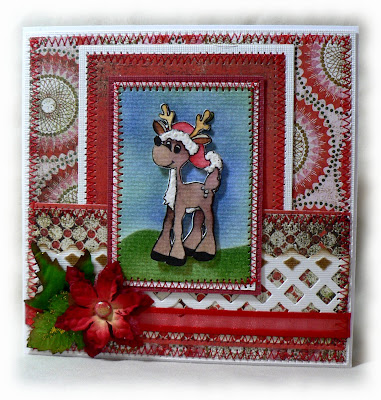
Here is my final photo. Can you see the difference?
Don't be afraid to play because you can always delete.
Next week I will go over how to add your watermark!
If you have any questions at all, please don't hesitate to leave a comment.





8 comments:
Fabulous tutorial Peg!!! Ummm now how about one on the way you color only I want video!! *wink* Great card too!!!
Peggy, great tutorial! Your card is so cute too. Thanks for your generosity:)
You are a Godsend. Thanks for doing the adding watermark next. I've been trying to do it for ages, and I am a visual learner, so this helps so much. Your steps are clear and so helpful!
Wow, Peg, this is super! I have Picasa and PSE and am not satisfied with either. I can't even guess how many hours I have put in trying to get my photos to look really good. And that fuzzy border, even just last week I spent an entire evening with PSE trying to achieve it. Thank you soooo much for this fabulous tutorial!!!
Мне очень понравилась открытка! Она такая яркая, праздничная!
What a great tut Peg!!
Great tutorial Peg!
I used to use Gimp all of the time and loved it. I have another program that I use now because I paid $$$$ for it for other purposes. LOL! Makes me feel I am getting more bang for my buck.
For those of you who do not have an easy editing program, Peg is right...Gimp is great and you sure as heck can beat FREE!
Peg's awesome tutorial should get you off to a running start.
Hugs,
True :)
WOW!!!!There are no words to describe your cards.I love everyone of them.I have a hard time choosing colors for my CS and DP.And yours are just perfect!And the tutorial.I love it.I download Gimp a long time ago but just never could use it.From now on Im a follower.
Post a Comment